Guide: How To Prepare Your Audio For Vinyl
By Simon Daley & Paul Miller

Pressing your first project? We asked Canadian musician, producer and engineer Scott Orr, to share some essential advice on how to prepare your audio for the best results.
The distinctive audio qualities of vinyl records are appreciated by millions of music lovers around the world. Optimizing your source audio before supplying it to us is a vital step in ensuring that your vinyl records sound the best they can. We asked experienced engineer and producer Scott Orr, to share some simple tips for preparing your audio for a vinyl release.
Introduction (0:21)
TRANSCRIPT ⇲
“Hi I’m Scott Orr, I’m a Canadian artist, producer and engineer. The team at Precision Record Pressing have asked me to share some simple steps that you can take to ensure that your audio files are prepared correctly, prior to submission. Following these steps will help you avoid potential audio re-submissions, which could delay the start of your project.”
Track Order & Distortion Risk (01:42)
TRANSCRIPT ⇲
“When preparing your audio for vinyl, it’s useful to understand the relationship between side length, track order, and audio quality.
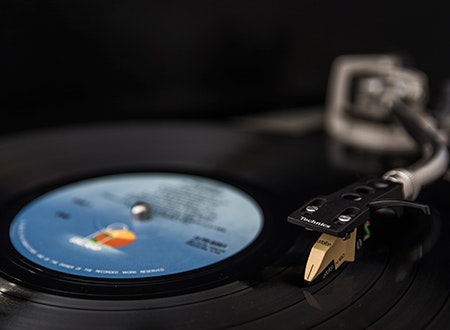
As the needle tracks the groove and moves inwards towards the center label area on a record, playback fidelity begins to decrease. With that in mind, PRP’s engineers strategically avoid cutting the audio close to the center of the disc as much as possible. However, this becomes a challenge on sides approaching and above 20 minutes in length, since they’ll have to use more of the available surface area to complete the program.
Near the center of the disc, it becomes harder for your turntable stylus to track high frequency information, such as sibilant vocals or bright drum cymbals. As the stylus begins to lose contact with this information, the audible effect is distortion.
This is a phenomenon called inner groove distortion. It’s advisable to place tracks containing a delicate high-end at the beginning or middle of the side and not towards the end. This may be especially noticeable on a heavy rock or delicate acoustic recording, with a high dynamic range.
Mechanical cutting equipment is also very sensitive to long and excessive high-frequency signals, beginning from 4-5 kHz. It’s advisable to curb these during the production and mixing stages, to avoid potential issues and re-submissions being required further down the line.
Finally, during the cutting process, PRP’s engineers will not add any silence in between your tracks unless specifically requested. Therefore if silence is desired, it’s advisable for you to add it to your recordings during the mixing or mastering stage.”
Digital Mastering (02:22)
TRANSCRIPT ⇲
“The first step before submitting audio files for any release, be it digital, physical or both is to have your recordings professionally mastered.
Mastering is an often misunderstood process and this can lead to some people dismissing it as unnecessary or an expensive add-on. When it comes to transferring your music to an analog format like vinyl, pre-mastering is essential. Professional mastering mitigates against rogue frequencies, ensures your recording meets the LUFS levels adopted by most digital platforms, and can make your bass punchier, highs more refined, as well as improve dynamics.
Creating digital and vinyl specific masters of your recording isn’t necessary in most circumstances. Instead it’s advisable to inform your mastering engineer that your recordings are destined for a vinyl release, which will allow them to make any necessary adjustments during the process to optimize the audio for vinyl. The same files can then be used for your digital and vinyl release.
It’s also important to be aware that maxing-out the loudness level at the pre-mastering stage will not necessarily ensure a loud cut when your digital audio is transferred to vinyl. This is because PRP’s engineers will cut the audio at the loudest possible level before distortion is detected. It’s advisable to leave a small amount of headroom, to ensure the engineer has some flexibility during the cut. For more information on PRP’s DMM Cutting, read the guide at precision pressing dot com slash guides.
The phrase “vinyl mastering” may also be used to refer to lacquer cutting by some studios. Be sure to clarify with your mastering studio which service you’re purchasing to avoid potential confusion. If you are supplying lacquers, it’s important that you don’t ship them before first placing an active order with PRP, to avoid a processing delay. Please speak to your account manager for detailed shipping instructions.
Finally, your mastering studio may ask you which formats you would like to receive your audio files in. The standard formats for submitting audio files to PRP are 16 or 24bit WAV files. Please avoid up or down-sampling from your recording’s native sample rate, as this may negatively affect playback quality and require re-submission.”
Catalog Number (00:41)
TRANSCRIPT ⇲
“Your mastering studio may ask you for a catalog number for your project. A catalog number is your project identifier, usually a short alphanumeric code. For example, if Precision Record Pressing were to make its first vinyl record project, it might choose PRP001. The catalog number can be anything you like, and doesn’t need to be registered anywhere. When placing an order with PRP you will be asked for your catalog number. It’s also advisable to include the catalog number in the names of your folders and files when submitting them, this avoids any possible confusion with ambiguously named zip files like “Mastered WAVs” or “24bit Master” etc.”

Track Listing & File Names (00:51)
TRANSCRIPT ⇲
“A complete track list with accurate times is a requirement to ensure that your project is cut correctly by PRP’s engineers. A track list is also required for projects with supplied lacquers or metalwork. Unless it’s a single-sided record, please specify which tracks belong on side A and which belong on side B, as well as C and D if it’s a double album. You may even title your tracks “A1 dash song name” and “B1 dash song name” and so on, to avoid any confusion.
Finally, you may also choose to provide side-long files for each side of your record. This would mean one long WAV file for all the songs on side A and then another for all the songs on side B. You will still need to provide a track listing breakdown with your order if sending side-long files.”
RPM & Side Lengths (00:36)
TRANSCRIPT ⇲
“As discussed previously, there is a close relationship between side lengths and audio fidelity on vinyl. The less time per side, the greater flexibility PRP’s engineers will have to deliver improved clarity, reduced distortion and optimal decibel levels. Longer sides will need to be cut at a quieter level to safely fit all the material on the disc.
Please familiarize yourself with the recommended times per side for each RPM and format:
12” | 33 RPM 15-22 Minutes
12″ | 45 RPM 12-16 Minutes
10″ | 33 RPM 12-15 Minutes
10″ | 45 RPM 9-12 Minutes
7″ | 33 RPM Not Recommended
7″ | 45 RPM 4-6 Minutes
Cutting a 7” at 33 RPM is not recommended as it increases the risk of excess distortion.”
Audio Submissions (00:49)
TRANSCRIPT ⇲
“Please add all your audio files to one folder, this makes it easier for PRP’s production team to keep track of everything. Your folder should then be compressed as a single zip file. Any folders that are not compressed will be rejected, as it won’t be possible to check for potential corruption in the upload or download process.
Finally, when filling out the order form you will be asked if you would like a “standard” or “loud cut” for your audio. A “loud cut” will prioritize volume over other factors, which may result in distortion across the program. If this isn’t requested, the default is a “safe cut”, in which the cutting engineer chooses the loudest volume possible before undue distortion is incurred. Please speak to your account manager if you have any questions about which cut is best for you.”
Recorded and mixed by Scott Orr at Other Songs Studios.
For more information visit otherrecordlabels.com.
Header photo by Adi Goldstein.